openlayers实现遮罩的三种方式
发布于July 05, 2020
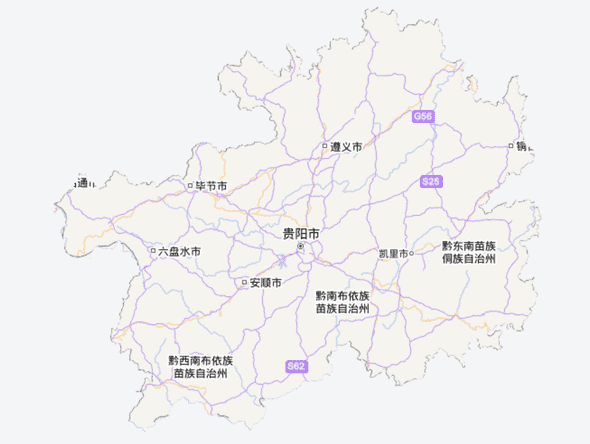
在平时的gis开发常常会遇到做地图的遮罩层。有原生的图层数据的话可以直接在gis桌面程序中提取出需要展示的区域。但一些不太方便的图层可以直接使用openlayer提供的api进行遮罩层的开发。经过不同的实验提取出了三种不同的方式来实现遮罩层。

使用LinearRing
主要思路
使用LinearRing可以实现类似环的效果,那么把比如本文使用的贵州的边界线数据来生成一个LinearRing就可以实现遮罩层。但是LinearRing是不能单独存在的,需要创建一个polygon,并使用appendLinearRing这个方法把LinearRing添加进去。而创建的polygon则可以是直接使用[-90,90],[-180,180]这样的extent来生成。
主要代码
import {Map, View} from 'ol';
import {Tile as TileLayer, Image as ImageLayer,Vector as VectorLayer} from 'ol/layer';
import {OSM, XYZ, ImageStatic, ImageCanvas,Vector as VectorSource } from 'ol/source';
import {getVectorContext} from 'ol/render';
import {transform, getTransform} from 'ol/proj';
import GeoJSON from 'ol/format/GeoJSON';
import {Polygon, LinearRing} from 'ol/geom';
import {fromExtent} from 'ol/geom/Polygon';
import Feature from 'ol/Feature';
import {Circle as CircleStyle, Fill, RegularShape, Stroke, Style, Text} from 'ol/style';
function erase(geom) {
// const extent = [-180,-90,180,90];
const Max=transform([-180,-90], 'EPSG:4326', 'EPSG:3857');
const Min=transform([180,90], 'EPSG:4326', 'EPSG:3857');
const extent = [Max[0],Max[1],Min[1],Min[1]];
const polygonRing = fromExtent(extent);
geom.applyTransform(getTransform('EPSG:4326', 'EPSG:3857'));
const coords = geom.getCoordinates();
coords.forEach(coord =>{
const linearRing = new LinearRing(coord?.[0]);
polygonRing.appendLinearRing(linearRing);
})
return polygonRing;
}
function addconver(converLayer,data) {
const fts = new GeoJSON().readFeatures(data);
const ft = fts?.[0];
const converGeom = this.erase(ft.getGeometry());
const convertFt = new Feature({
geometry: converGeom
});
converLayer.getSource().addFeature(convertFt);
}
代码解析
在本文档中使用的是geojson数据。在addconver函数中对geojson数据进行解析(可以将geojson数据后缀名改为.json并直接import),解析出贵州的边框数据后在erase函数中生成linearing并添加到覆盖整个图的polygon中。最后将生成的layer添加到map对象中即可。尤其要注意投影的变换。
使用canvas
主要思路
借助openlayers提供的ImageCanvasSource 来添加canvas图层,数据源依旧采用的是贵州geojson文件。添加canvas后利用geojson解析出的边界坐标点使用canvas的api生成一个面,并使用canvas的’destination-out’来实现中空的一个效果。
主要代码
function render(geo_data){
const fts = new GeoJSON().readFeatures(geo_data);
const ft = fts?.[0];
const coords = ft.getGeometry().getCoordinates();
const data = coords?.[0]?.[0];
//参数1:extent array 左下角投影坐标与右上角投影坐标
//参数2:resolution 要生产图像的分辨率
//参数3:设备像素比
//参数4:图像实际大小
//参数5:投影
return function(extent, resolution, pixelRatio, size, projection){
//每次的范围变动都会引起重绘,从而触发该回调函数,
const [width, height] = size; //画布尺寸
const [left, bottom, right, top] = extent; //坐标投影
const xScale = width / (right - left); //画布尺寸与坐标投影比
const yScale = height / (top - bottom);
const transform = getTransform('EPSG:4326', 'EPSG:3857');
const canvas=document.createElement('canvas');
canvas.width=width;
canvas.height=height;
const ctx = canvas.getContext('2d');
ctx.fillStyle = "rgba(255,255,255,1)";
ctx.fillRect(0,0,width,height);
ctx.globalCompositeOperation = 'destination-out';
ctx.beginPath();
data.forEach((coor,index)=>{
const [lon,lat] = transform(coor);
const x = (lon - left) * xScale; //转换成手机次尺寸的xy
const y = (top - lat) * yScale;
index===0?ctx.moveTo(x, y):1;
ctx.lineTo(x,y);
})
// ctx.strokeStyle = 'rgba(0,0,0,0.5)';
ctx.fill();
// ctx.restore();
// ctx.fill();
return canvas;
}
}
const imageCanvas=new ImageCanvas({
//创建回调函数如下
//data为geojson
canvasFunction:render(data),
});
const imageLayer=new ImageLayer({
source:imageCanvas
});
代码解析
上面render函数中的坐标转canvas坐标是在网上找的,代码的思路还是很清晰的,只需要注意ctx.globalCompositeOperation = ‘destination-out’;
使用图层事件和canvas
这种方式也是使用canvas和’destination-out’,但是使用的是openlayer自带的api,使用起来会简单和方便许多,就是第二种方式的进化版。使用图层的’postrender’事件,在图层加载完成之后获取上下文并添加。
主要代码
function addPolyon(converLayer,geo_data){
const fts = new GeoJSON().readFeatures(geo_data);
const ft = fts?.[0];
ft.getGeometry().applyTransform(getTransform('EPSG:4326', 'EPSG:3857'))
converLayer.getSource().addFeature(ft);
return converLayer;
}
//获取图层
const _layer = map.getLayers().getArray()?.[1];
const newcliplayer = addPolyon(clipLayer,data);
_layer.on('postrender', e=> {
e.context.globalCompositeOperation = 'destination-in';
const vectorContext = getVectorContext(e);
newcliplayer.getSource().forEachFeature(feature=>{
vectorContext.drawFeature(feature, style);
});
e.context.globalCompositeOperation = 'source-over';
});
总结
使用第三种方式无论是在性能还是代码量来说都是优势,第三种也是ol官方推荐的一种。